This provides an overview of how to utilize a reverse proxy in a containerized environment. This tutorial will focus on Nginx Proxy Manager due to its simplicity and ease of use.
Prerequisites
- Docker and Docker-Compose.
- A way to manage local DNS
- Basic understanding of creating Docker containers using Docker-Compose.
- A domain (ideally through Cloudflare) if you value secure connection over LAN.
Container Setup
We will be using the yml file from the official Nginx Proxy Manager page with minor adjustments.
 1services:
 2  app:
 3    container_name: npm
 4    image: 'jc21/nginx-proxy-manager:latest'
 5    networks:
 6      - proxy
 7    restart: unless-stopped
 8    ports:
 9      - '80:80'
10      - '81:81'
11      - '443:443'
12    volumes:
13      - ./data:/data
14      - ./letsencrypt:/etc/letsencrypt
15
16networks:
17  proxy:
18    external: true
The highlighted lines can be removed if you are not using a Docker network or if you don’t have a network titled proxy. If you want to create the network you can use the following command.
sudo docker network create proxy
Now spin up the container and access the web interface in your preferred browser using the server IP and port. For example, 10.0.1.64:81.
Account Creation
You’ll be presented with the login screen. The default username and password are [email protected] and changeme respectively. Upon first sign-in, you’ll be prompted to change the username and password.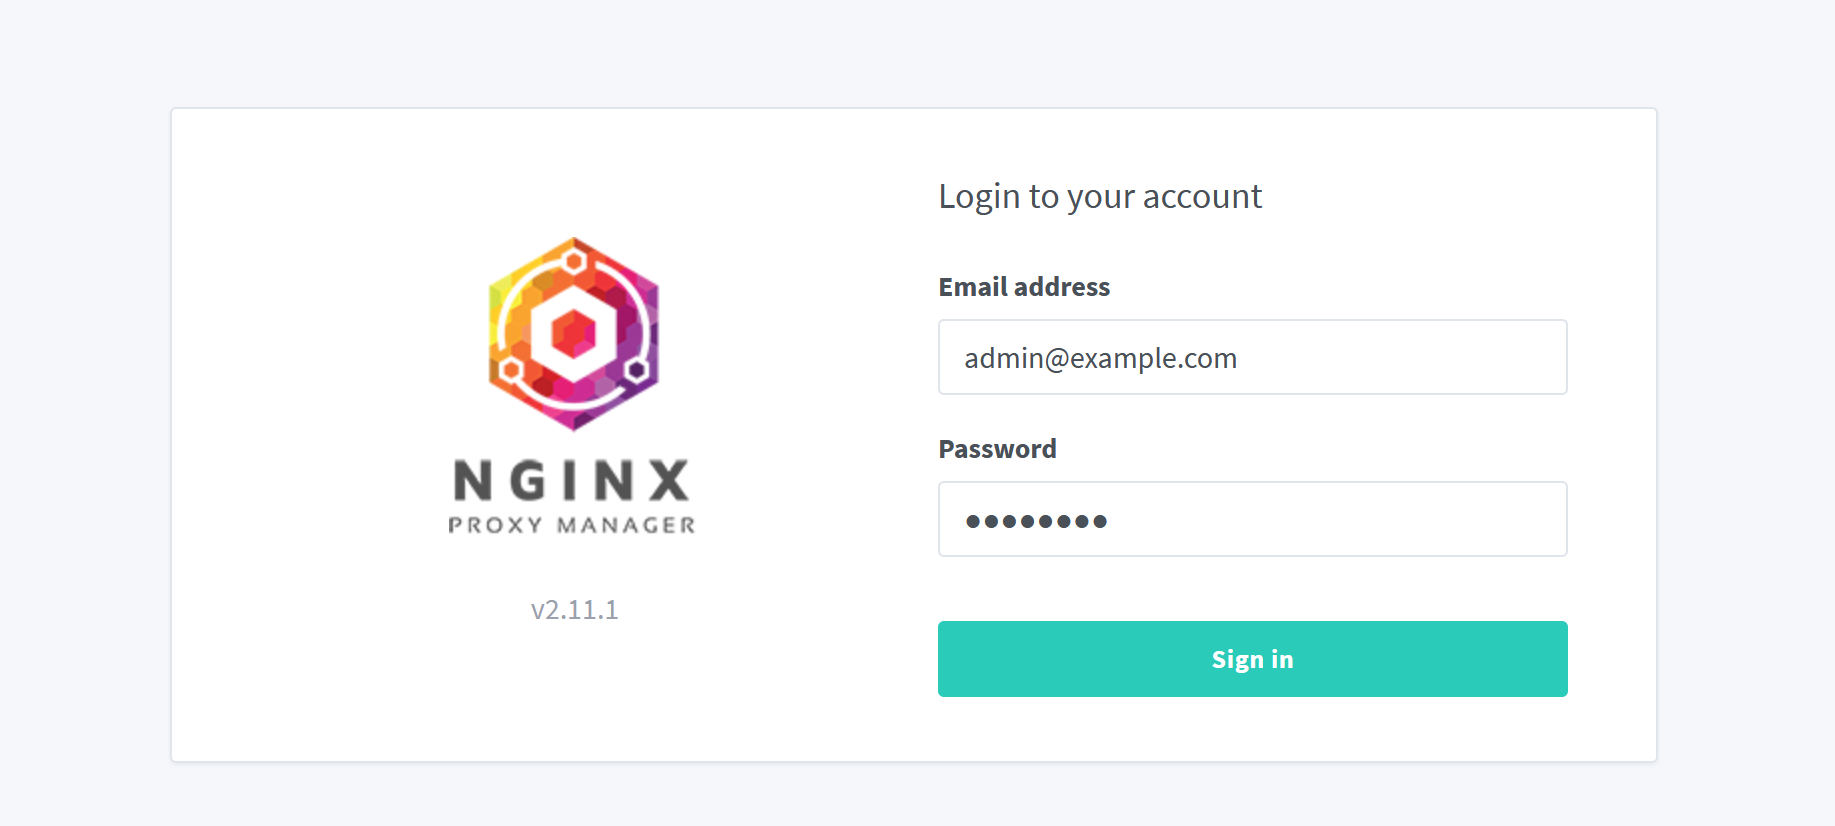
Proxy Host Creation
Let’s say I want dozzle-prod-1.chiefnick.com to take me to the existing Dozzle web interface that I have running in Docker so that I don’t have to type in 10.0.1.64:9999 every time I want to view Dozzle logs. This will be done through proxy hosts in Nginx Proxy Manager.
On the dashboard, click the Proxy Hosts button and hit the Add Proxy Host button. This will pull up the modal to create a proxy host.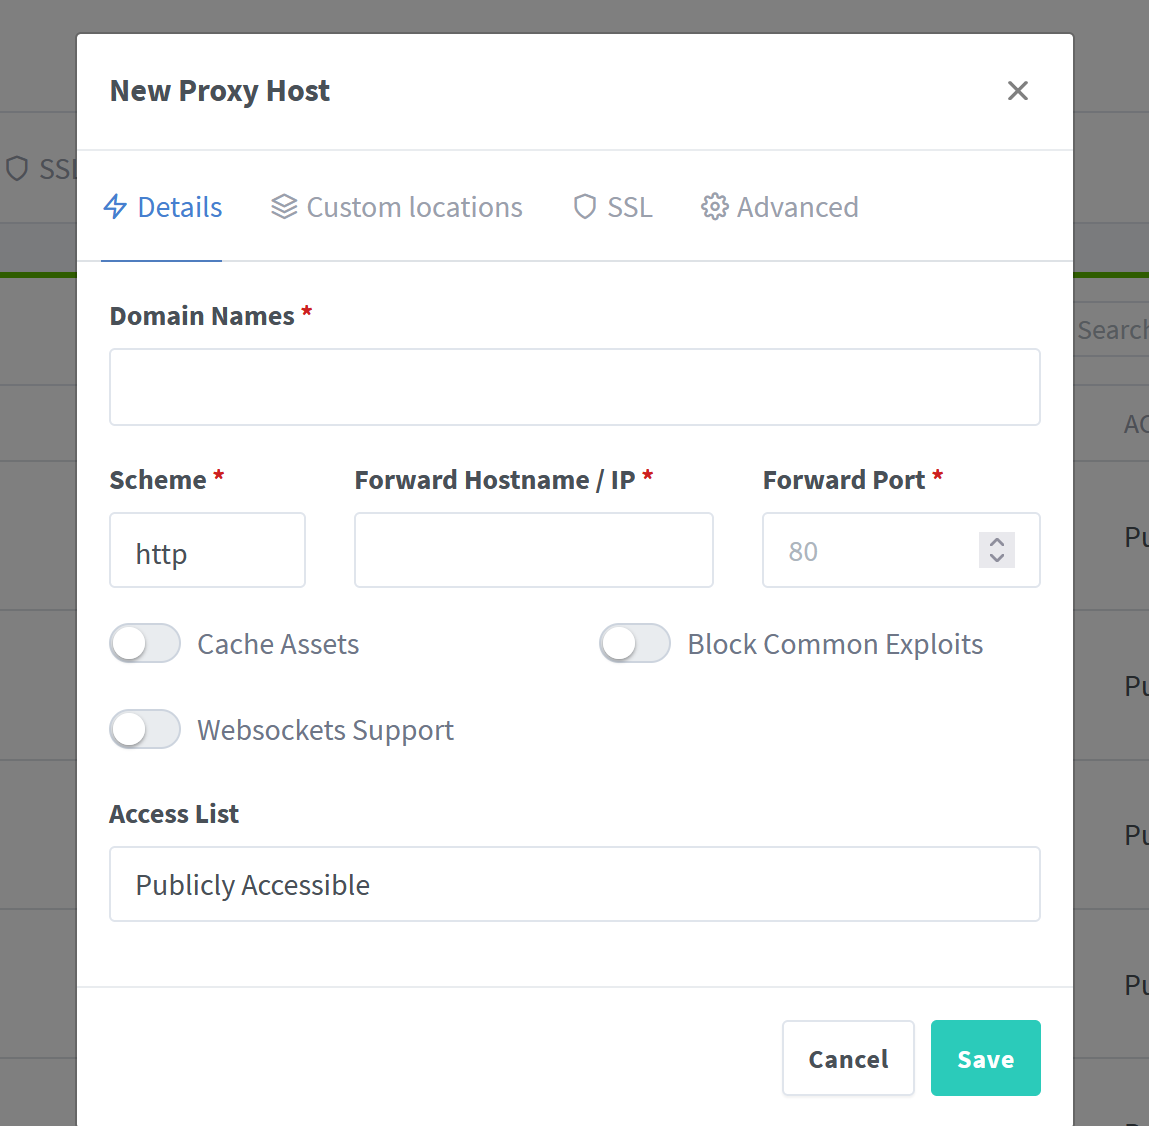
domain name is what domain we want to be associated with a specific service. In this example, we want dozzle-prod-1.chiefnick.com in that field.
Scheme is almost always http with very few exceptions. Unless in the documentation of a container it specifies that it’s https assume it is not.
Forward Hostname/IP can be one of two things.
- If the container you are creating the proxy host for is in the same Docker network as the reverse proxy container, you can just enter the name of the container. The name of the container is in the
ymlfile in the property titledcontainer_name. If the container doesn’t havecontainer_nameI suggest assigning it a name by adding the property then rebuild the container with the following command.
sudo docker-compose up -d
- If the previous condition is not met, you can enter the IP address of the server running the container. I would personally advise against this approach because the point of using a reverse proxy is to limit the amount of ports exposed on a computer and this defeats that purpose.
Forward Port can be one of two things.
- If you used the name of container for the forward host in the previous step, enter the Docker port of the container and not the exposed port. Check the
ymlfile and pick the port to the right of the colon. For instance,9999:8080you’d use8080. - If you used the IP, enter the exposed port number. This is port to the left of the colon. For instance,
9999:8080you’d use9999.
The remaining settings aren’t so important. I typically toggle Block Common Exploits and Websockets Support and call it a day. Below is the finished product.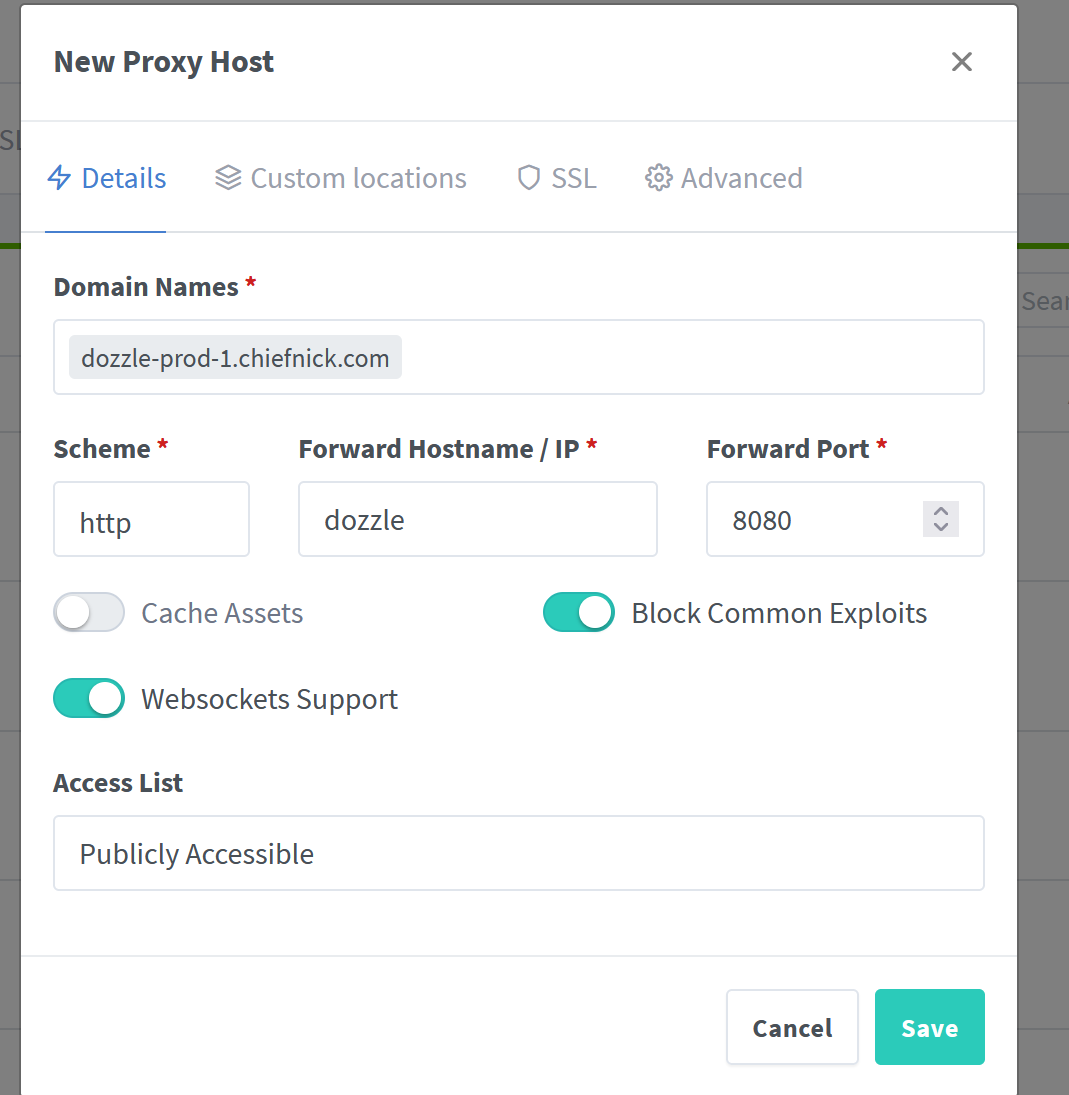
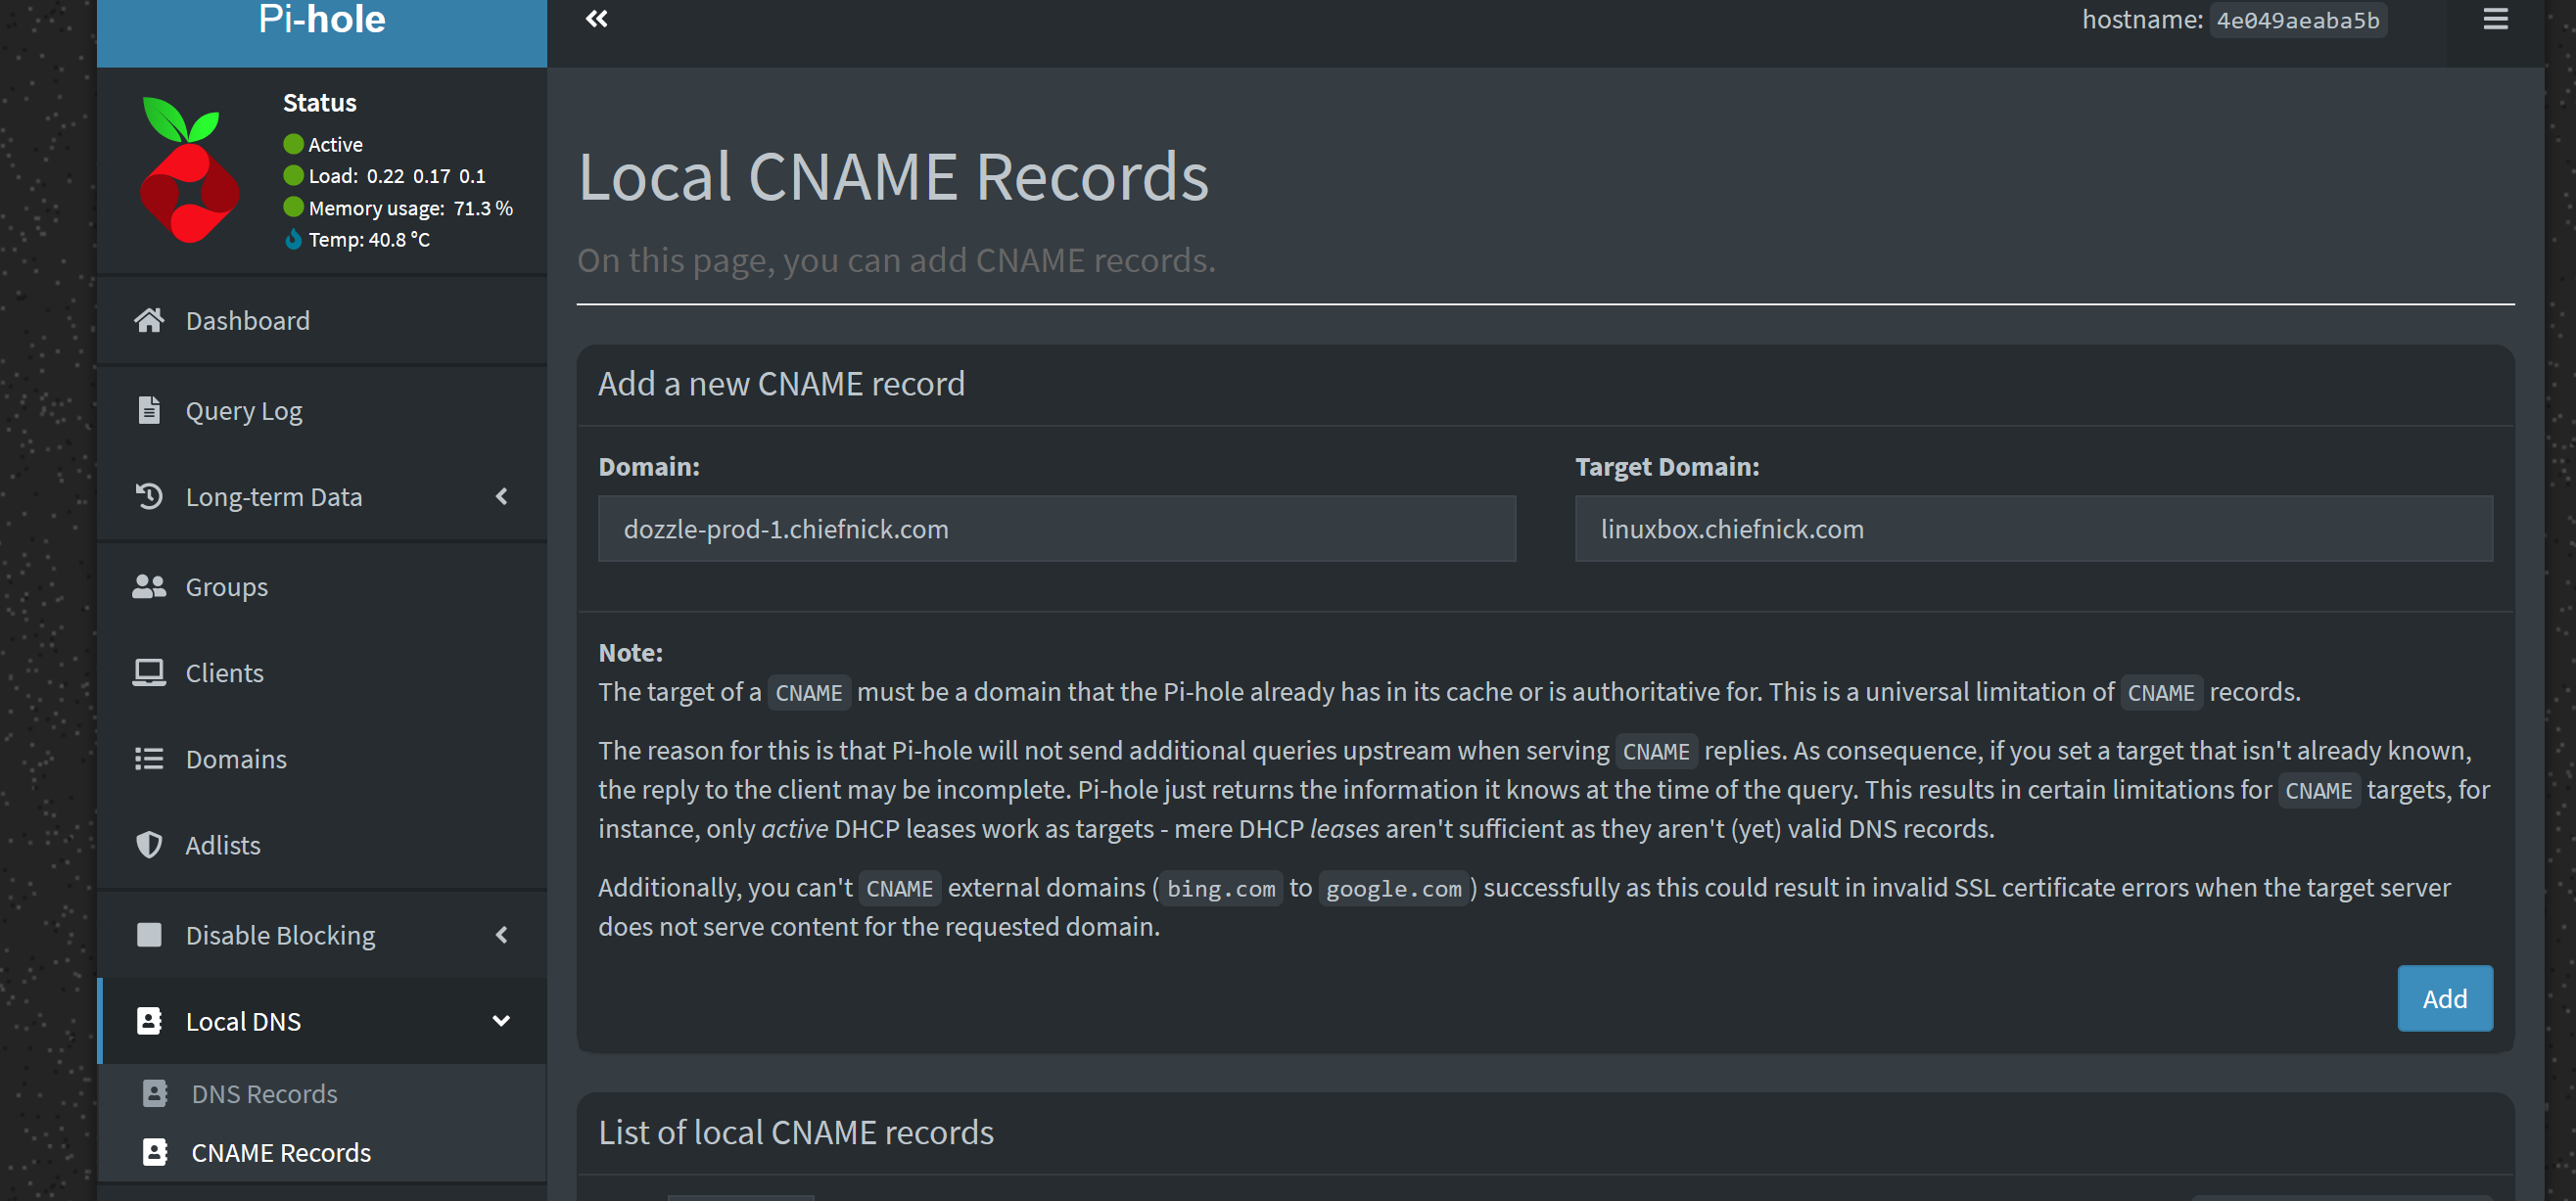
Now if you attempt to navigate to the site, it should work; however, it will not be a secure connection and your browser will likely do everything in its power to prevent you from accessing the page. If you are fine with this (considering it’s only accessible over LAN), I guess you can stop here.
Also, it is worth mentioning that if you set up the forward host using the hostname of the container, you do not need the port anymore in the yml file. You can remove those lines entirely and rebuild the container. Keep in mind, you’ll now longer be able to access it with the IP and port anymore, but that shouldn’t be an issue.
Applying SSL Certs
This assumes you have a domain
Explaining how certs work is beyond the scope of this tutorial, and I’d rather not bore you with a wall of text. Cloudflare provides a very good explanation that you can find here.
TL;DR: It makes the ’not secure’ warning go away.
On Nginx Proxy Manager, click on the SSL Certificates tab then click Add SSL Certificate. Select Let's Encrypt. Unless you want to create a certificate for every single subdomain on your domain, I suggest applying for a wildcard certificate. To do this, enter *.<domain_name>.<tld>. For me, I’d do *.chiefnick.com. Select the Use a DNS Challenge toggle switch. This depends on the DNS provider you use with your domain. I’m using Cloudflare so I’ll select Cloudflare.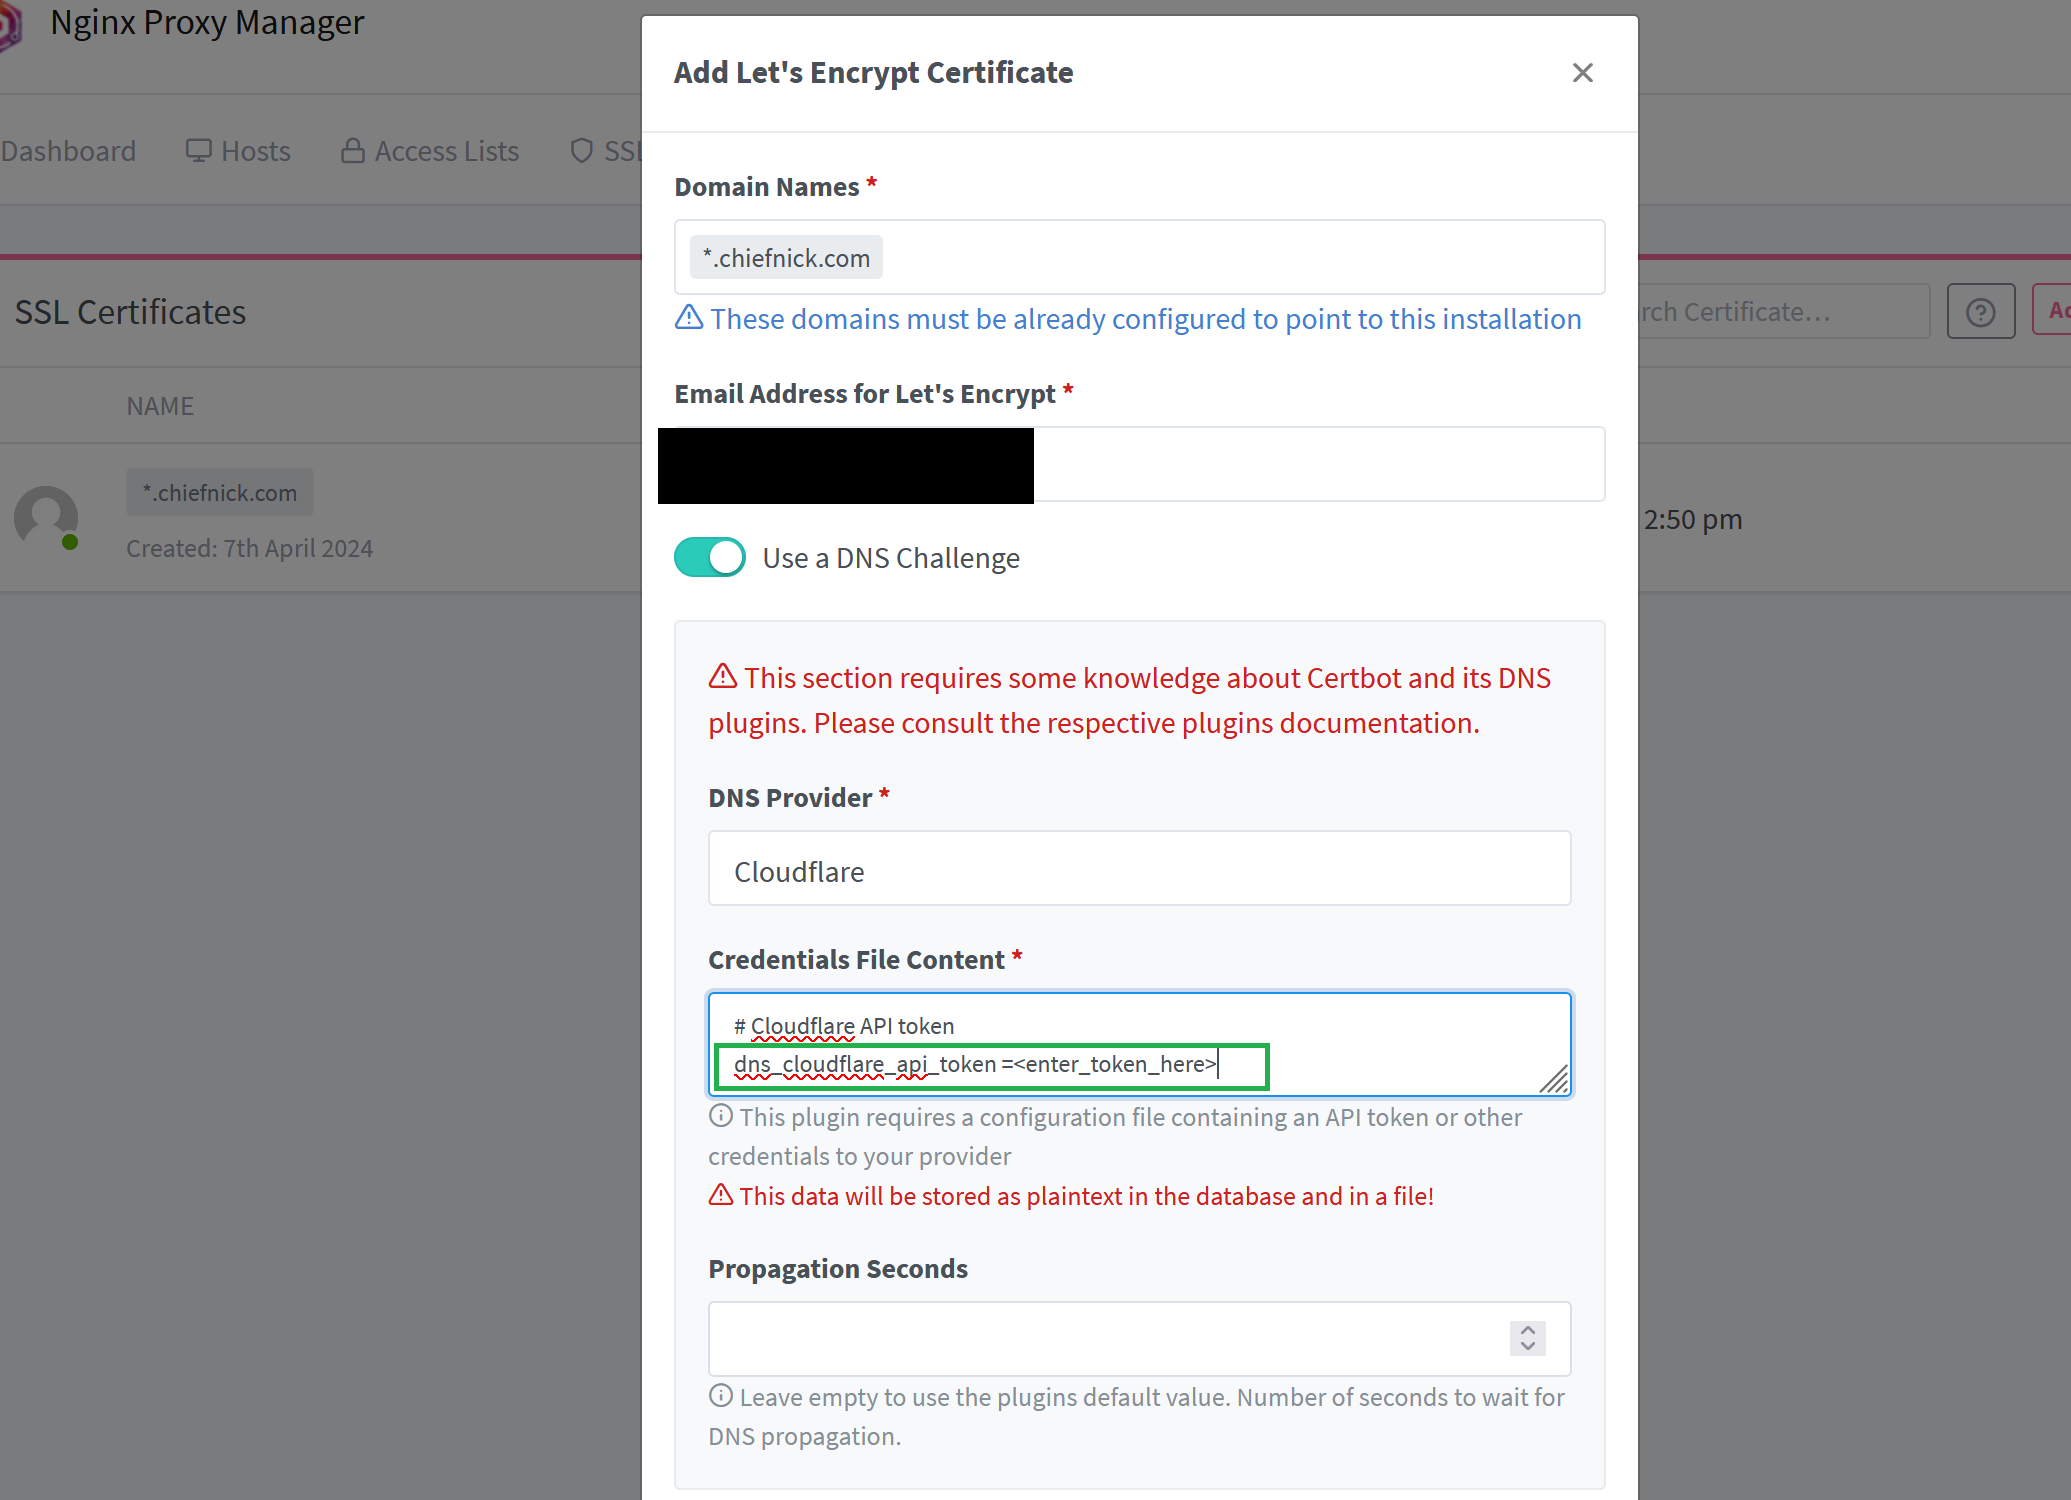
Create Token. Use the Edit Zone DNS template.
Change the Zone Resources to include your domain. Additionally, you will probably want to change the Token name so you aren’t confused in the future.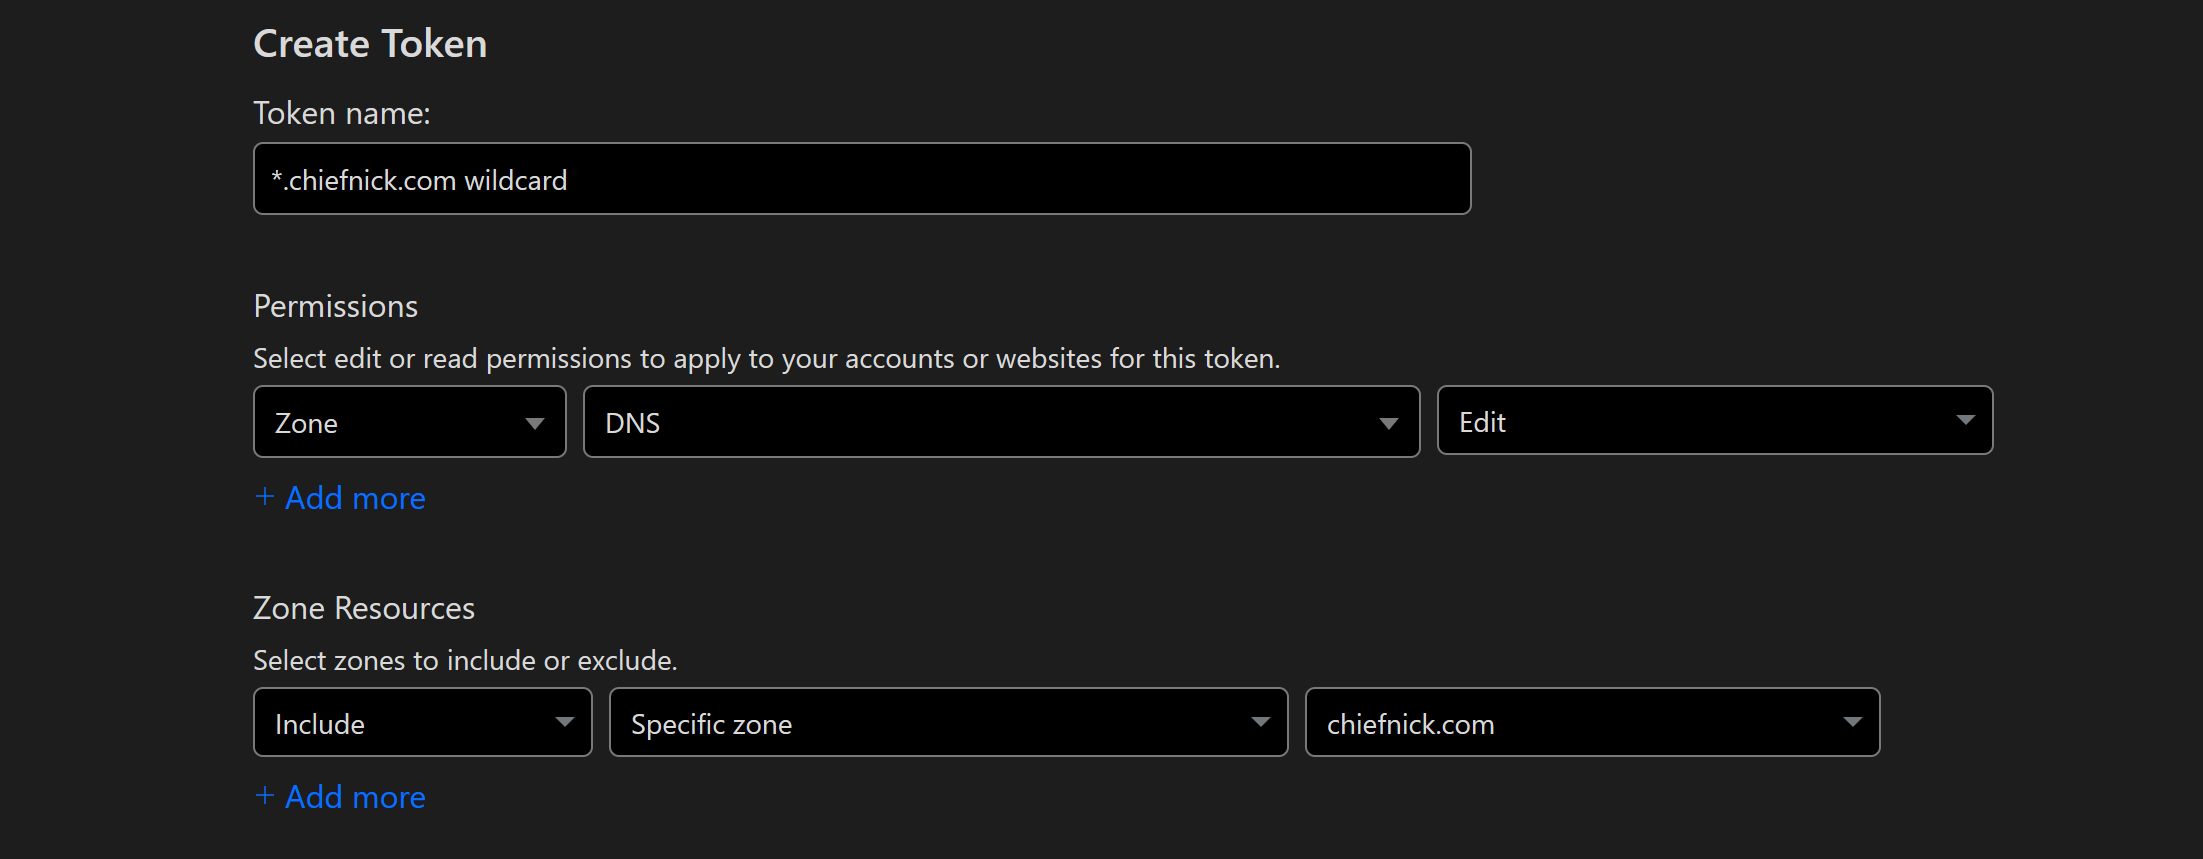
dns_cloudflare_api_token field, assuming you’re using Cloudflare. Hit the save button and give it a couple seconds.
Since this is done through Let's Encrypt the certificate is only valid for 90 days, but Nginx will automatically renew this certificate for you.
To apply the certificate, navigate to the dashboard and click on Proxy Hosts. Click the three dots next to the proxy host you want to apply the certificate to. Click the SSL tab. Click the dropdown and select the certificate you recently got. Toggle Force SSL and hit save. Try to access your site again, and you should see the connection is now encrypted.