This provides an overview of how to manage local DNS with Docker using Pi-hole. Below are the prerequisites and setup instructions.
Prerequisites
- Docker and Docker-Compose.
- Basic understanding of DNS concepts and networking fundamentals.
- Basic understanding of creating Docker containers using Docker-Compose.
- See the previous tutorial if you’re not familiar with the procedure.
Container Setup
We will be using a slightly modified version of the official Pi-hole yml file that can be found on their GitHub repo.
 1services:
 2  pihole:
 3    container_name: pihole
 4    image: pihole/pihole:latest
 5    networks:
 6      - proxy
 7    ports:
 8      - "53:53/tcp"
 9      - "53:53/udp"
10      - "8053:80/tcp"
11    environment:
12      TZ: 'America/New_York'
13      WEBPASSWORD: <password>
14    volumes:
15      - './etc-pihole:/etc/pihole'
16      - './etc-dnsmasq.d:/etc/dnsmasq.d'
17    restart: unless-stopped
18
19networks:
20  proxy:
21    external: true
In this example, I’ve added a network and changed the exposed port for port 80 to 8053. This is because I will be using my reverse proxy on port 80 and not adjusting this will lead to issues. Feel free to modify this as needed.
Spin up the container and navigate to the web interface. It will be <server ip>:<8053>/admin. For instance, 10.0.1.64:8053/admin. You’ll be presented with a login screen. Simply sign in using the same password as the WEBPASSWORD environment variable in the yml file.
Managing Local DNS
It’s important to note that you will need to change your DNS server to the IP of the server you installed Pi-hole onto on your router or this will not work. The steps vary depending on the type of router, but if you follow this Cloudflare documentation, you can get a pretty good idea of what you need to do.
To manage local DNS, click on Local DNS to expand the DNS options and select the DNS Records button. There will be two boxes. One for an IP address and another for the domain. Let’s say for example, I want to make it so that I want linuxbox.chiefnick.com to resolve internally to my server running Ubuntu that has the local IP of 10.0.1.64. This is how I’d do it.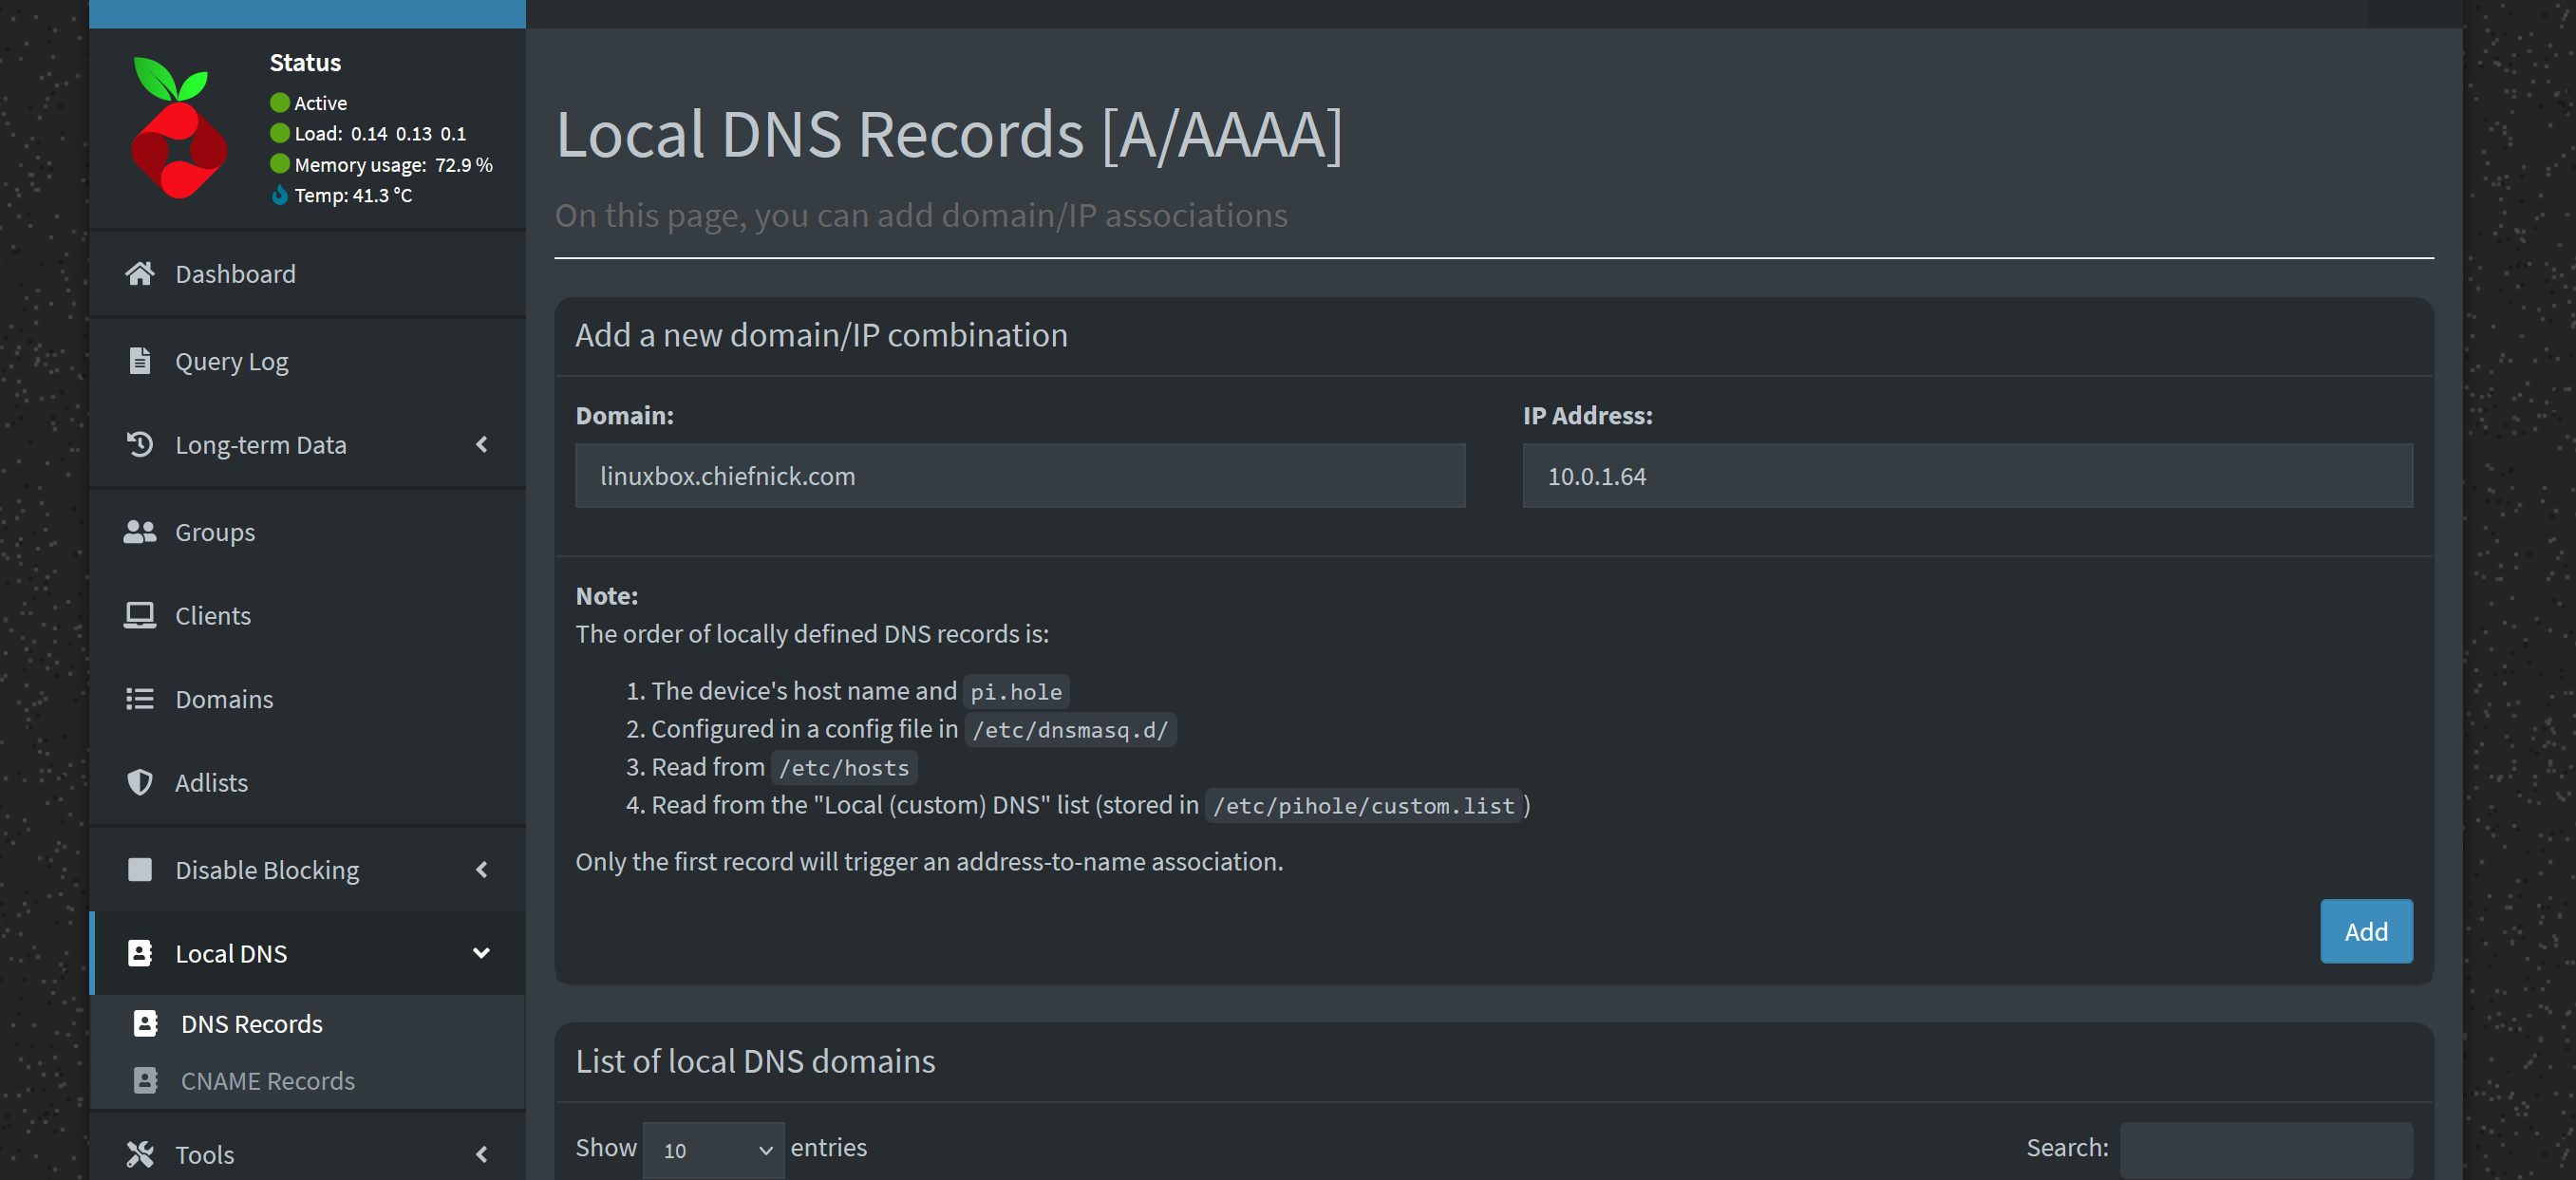
That’s about all that needs to be done. You can confirm it’s working by utilizing the nslookup cmdlet. By default, it will use the primary DNS server.
nslookup linuxbox.chiefnick.com
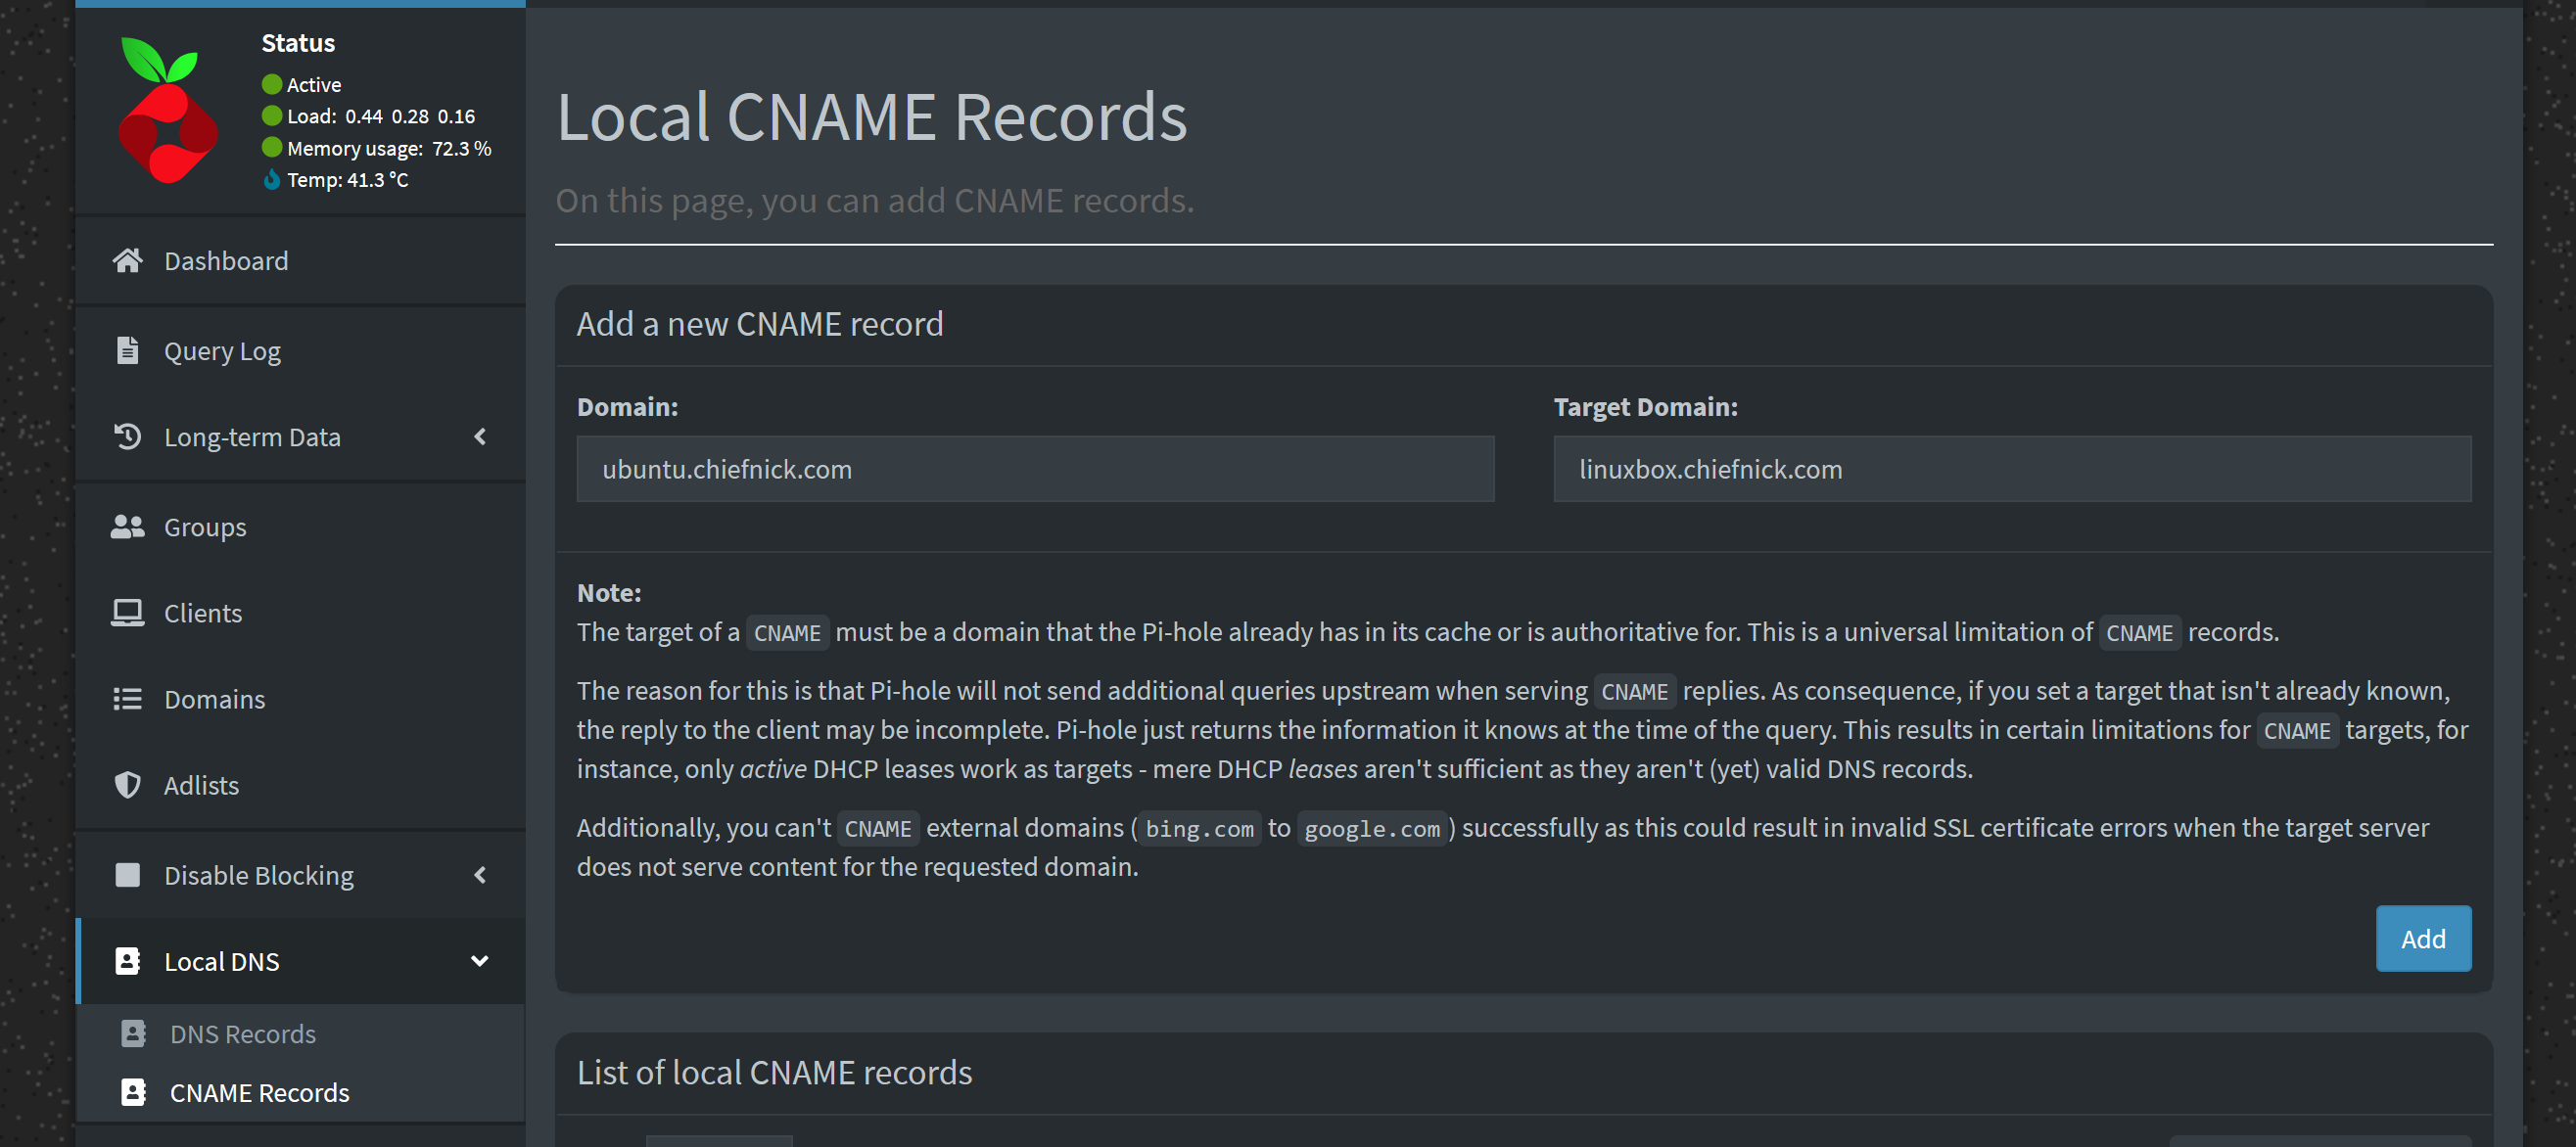
In addition to a traditional DNS record, we can also create a CNAME record in the same Local DNS tab.
CNAME records are basically aliases that will point a specified domain to an existing DNS record.
This may seem kind of useless,
but it’s handy and powerful when used in conjunction with a reverse proxy,
such as Nginx Proxy Manager and Traefik.