Authentik is an open-source Identity Provider that emphasizes flexibility and versatility. It can be seamlessly integrated into existing environments to support new protocols. Authentik is also a great solution for implementing sign-up, recovery, and other similar features in your application, saving you the hassle of dealing with them.
We will be utilizing this to secure our Docker containers and to manage who is able capable of accessing them.
Prerequisites
- Docker and Docker-Compose.
- Basic understanding of DNS concepts and networking fundamentals.
- Basic understanding of creating Docker containers using Docker-Compose.
Creating Container
This is the basic file structure I’ll be using. We will be creating a .env file inside the authentik folder.
.
└── ~/docker/
    └── authentik/
        ├── docker-compose.yml
        └── .env
Change your current working directory to the authentik folder. We will need to create a password for the database and a secret key.
echo "PG_PASS=$(openssl rand -base64 36)" >> .env
echo "AUTHENTIK_SECRET_KEY=$(openssl rand -base64 36)" >> .env
To enable error logging, use the following command to append this line to the .env file.
echo "AUTHENTIK_ERROR_REPORTING__ENABLED=true" >> .env
If you would like to set up an SMTP server/SMTP relay on authentik, you can append these lines to the .env file. This configuration has been modified for use with a Google app password. You can learn more about Google app passwords here.
# SMTP Host Emails are sent to
AUTHENTIK_EMAIL__HOST=smtp.gmail.com
AUTHENTIK_EMAIL__PORT=587
# Optionally authenticate (don't add quotation marks to your password)
AUTHENTIK_EMAIL__USERNAME=<mygmail>@gmail.com
AUTHENTIK_EMAIL__PASSWORD=<app_password>
# Use StartTLS
AUTHENTIK_EMAIL__USE_TLS=true
# Use SSL
AUTHENTIK_EMAIL__USE_SSL=false
AUTHENTIK_EMAIL__TIMEOUT=10
# Email address authentik will send from, should have a correct @domain
AUTHENTIK_EMAIL__FROM=authentik@domain.com
With that out of the way, we will pull the official Docker-Compose yml file.
wget https://goauthentik.io/docker-compose.yml
I’m going to make some minor revisions to this. I will make sure each container in the stack has a name and is part of the custom proxy network I’ve created. It doesn’t matter what you name them. There are four containers in the stack, so you’ll need to do this four times. See below for an example.
 1...
 2 worker:
 3    image: ${AUTHENTIK_IMAGE:-ghcr.io/goauthentik/server}:${AUTHENTIK_TAG:-2024.4.2}
 4    container_name: authentik_worker
 5    networks:
 6      - proxy
 7    restart: unless-stopped
 8    command: worker
 9    environment:
10      AUTHENTIK_REDIS__HOST: redis
11      AUTHENTIK_POSTGRESQL__HOST: postgresql
12      AUTHENTIK_POSTGRESQL__USER: ${PG_USER:-authentik}
13      AUTHENTIK_POSTGRESQL__NAME: ${PG_DB:-authentik}
14      AUTHENTIK_POSTGRESQL__PASSWORD: ${PG_PASS}
15...
Remember to declare the network in the yml file somewhere. I typically do this at the bottom.
 1...
 2volumes:
 3  database:
 4    driver: local
 5  redis:
 6    driver: local
 7
 8networks:
 9  proxy:
10    external: true
You should not be able to spin up the container and access it in your browser using the following.
http://<server IP>:9000/if/flow/initial-setup/
All you should need to do from here is create the initial admin account. I’m going to create a CNAME and proxy host for this to access it securely through Pi-hole and Nginx Proxy Manager respectively. Follow my previous tutorials if you would like to do the same.
Securing An Application with Authentik and Nginx
With Authentik, we are able to control which applications are accessible to certain people. It’s a fairly simple procedure in Authentik.
- First, navigate to the admin interface on the web interface of Authentik.
- Expand the
Applicationstab then clickProviders. Click theCreatebutton to create a new provider. - Choose the
Proxy Providerand hit next. - Set the name to something that makes sense. I’ll be naming it
Dozzle.Authentication flowwill be thedefault-authentication-flow.Authorization flowis less important and can either of them. - Select
Forward auth (single application)and enter the DNS entry of the application you are trying to secure with Authentik. I had previously created the CNAME entrydozzle-prod-1.chiefnick.com, so I will use that. Click finish.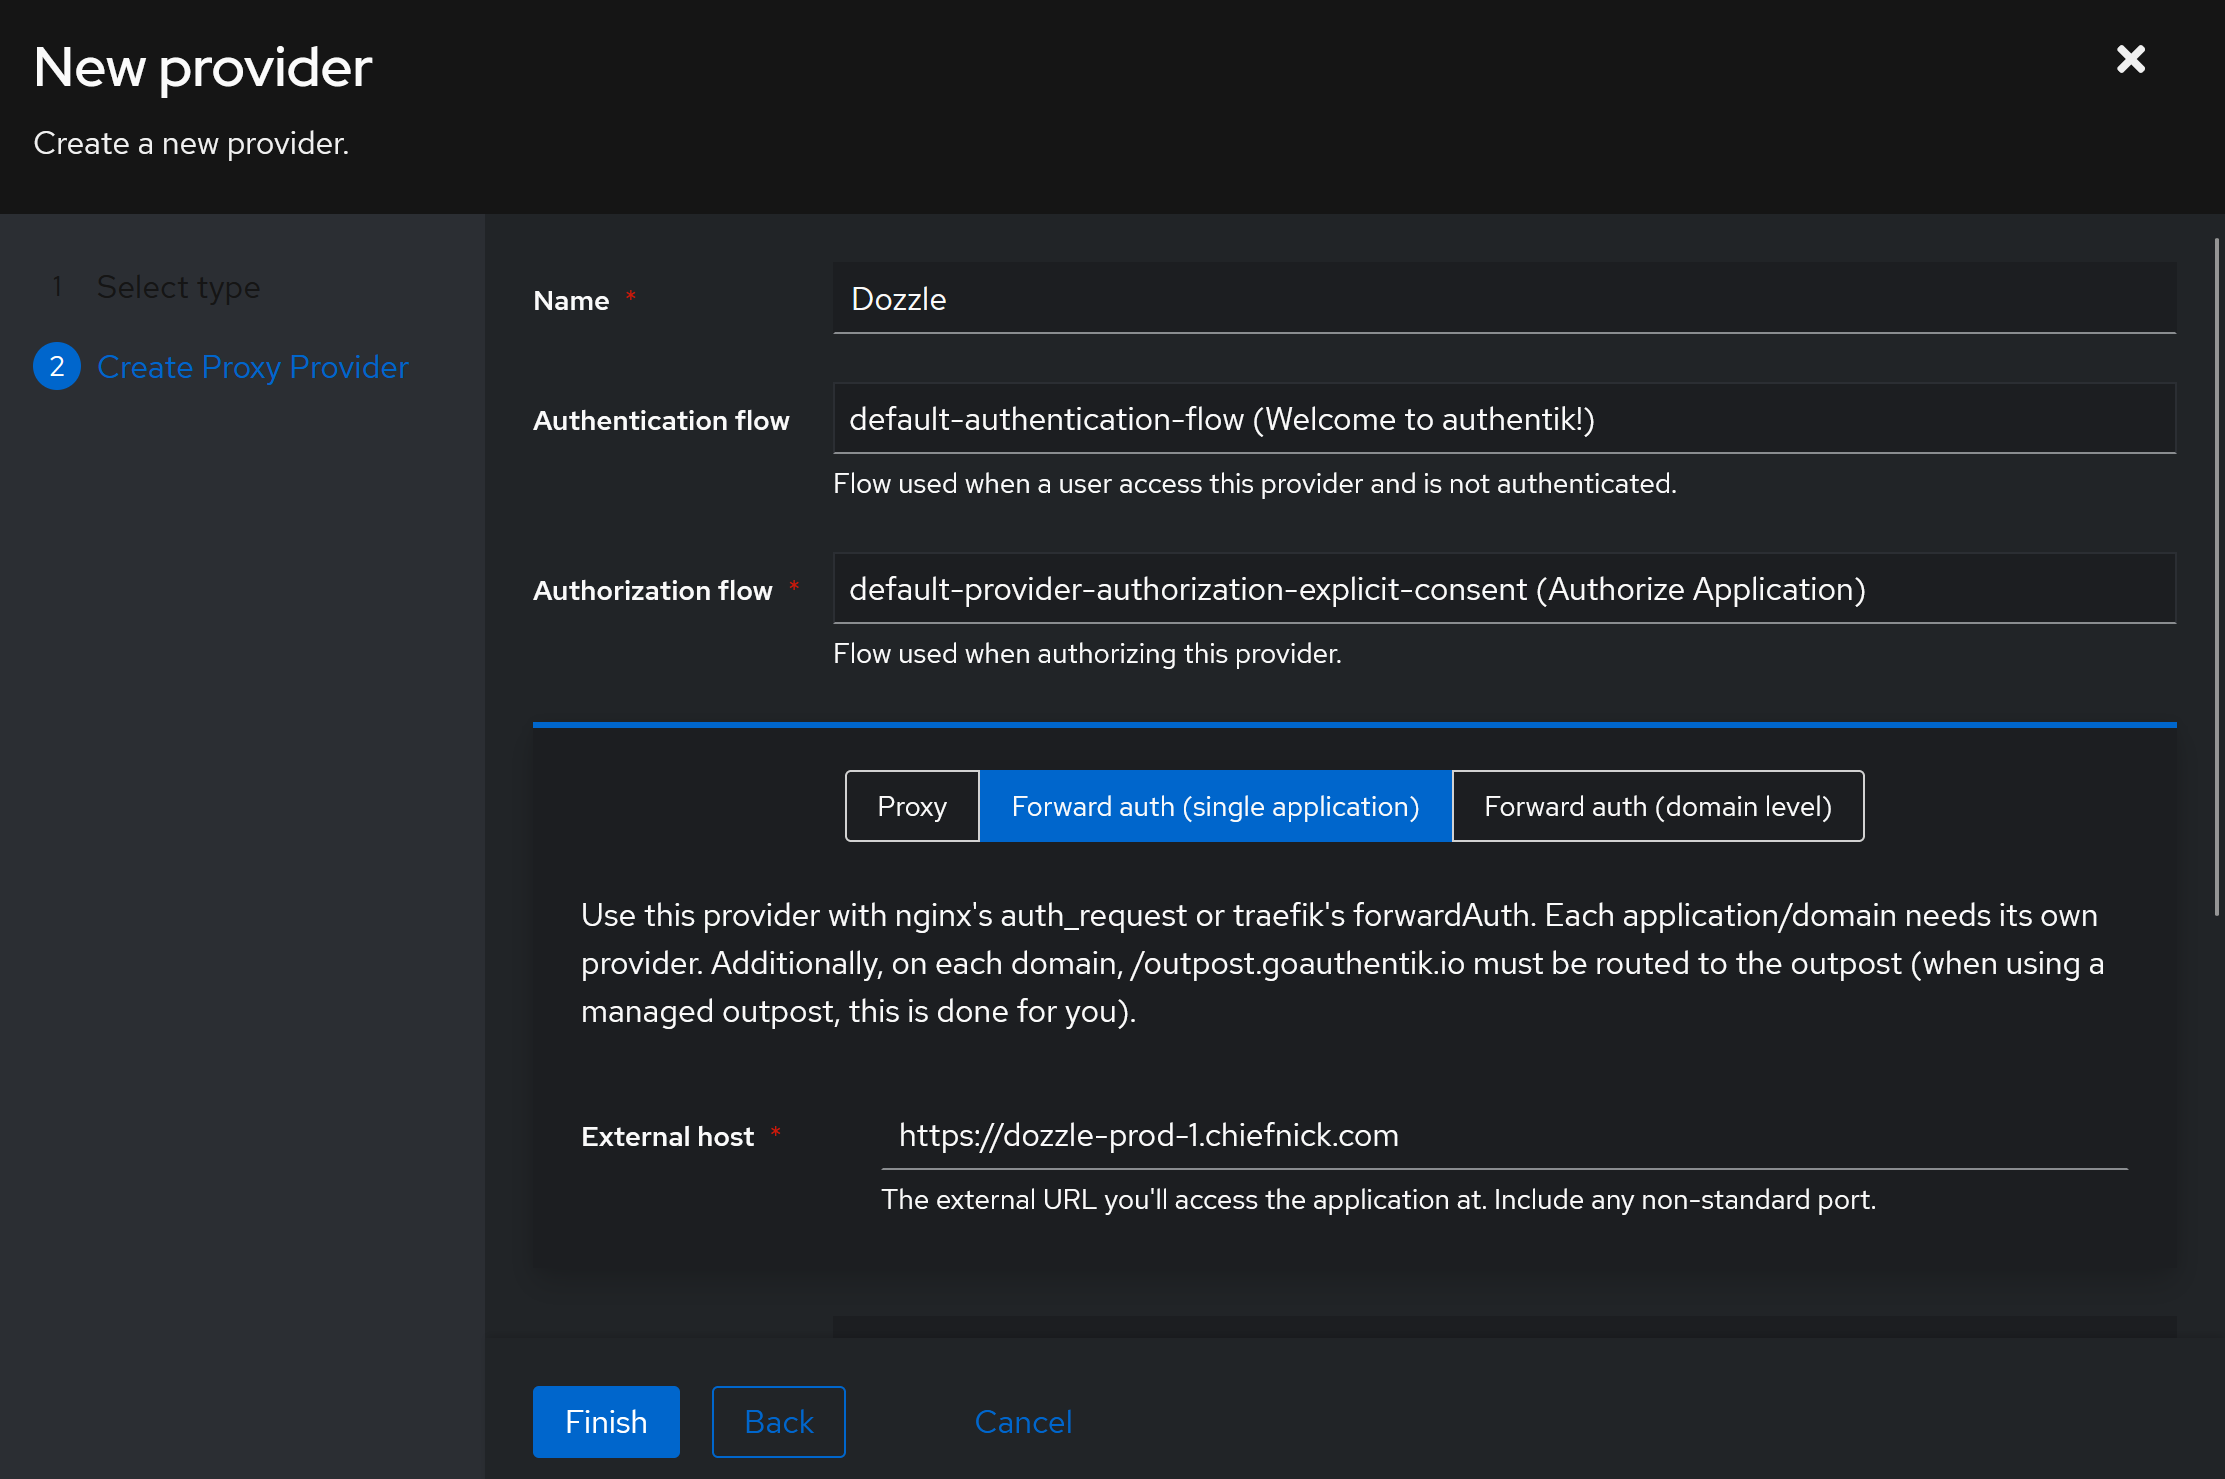
- Expand
Applicationsand clickApplications. - Enter a name that makes sense. Make the slug the same as the name but all lowercase letters. Select the provider you created for
Provider. Click theCreatebutton.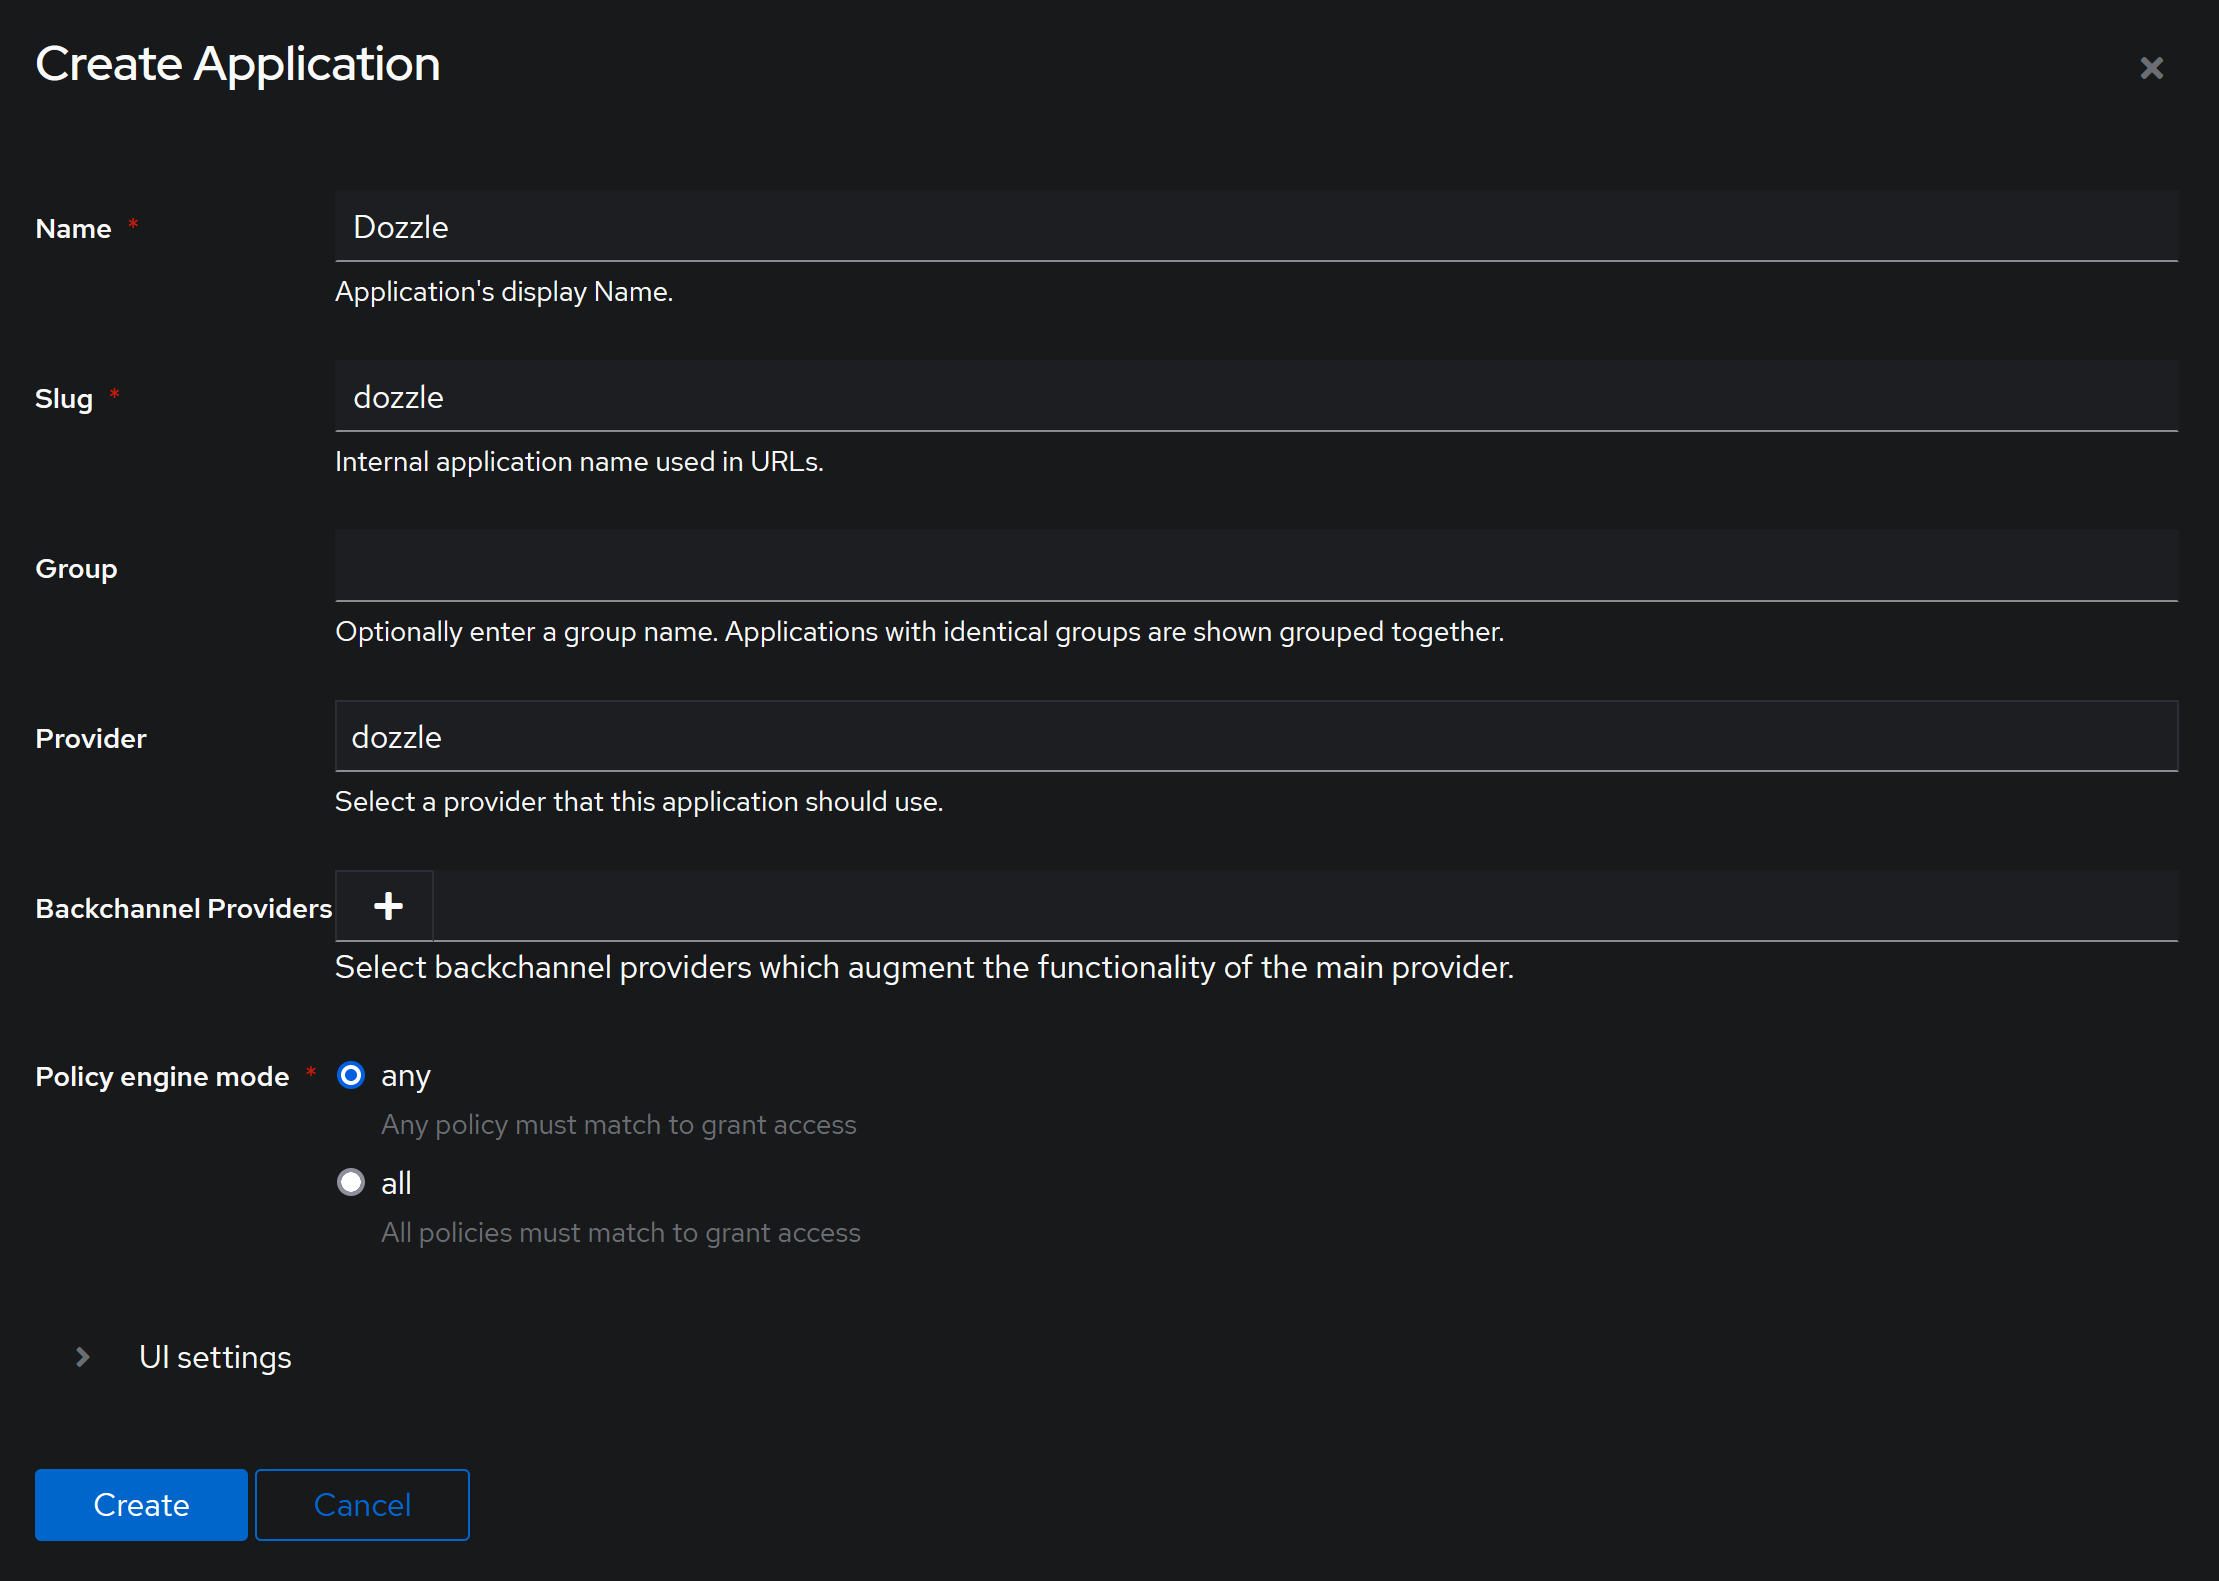
- Expand
Applicationsand clickOutposts. There should be one. Click on the edit button on the outpost. - Click the application you just created in
Available Applicationsand click the arrow to move it over. Click the update button. - Go back to the
Providerstab and click on the provider you created. This part varies depending on the reverse proxy you’re using. I’ll be using Nginx Proxy Manager. Under theSetuppane, clickNginx (Proxy Manager). This will spit out a bunch of text, which may seem intimidating at first, but is very simple. We will be putting this in theAdvancedtab of our proxy host in Nginx Proxy Manager. - Navigate to Nginx Proxy Manager and click the edit button on the proxy host you have configured and navigate to the
Advancedtab. - Copy and paste this into the
Custom Nginx Configurationbox. We will need to make one very minor adjustment. We need to modify theproxy_passattribute to point it to our outpost. By default, it’s set tohttp://outpost.company:9000/outpost.goauthentik.io;. The easiest way to get it to work is to just use the IP address of the server. For instance, I would do something like the following.
 1...
 2# all requests to /outpost.goauthentik.io must be accessible without authentication
 3location /outpost.goauthentik.io {
 4    proxy_pass              http://10.0.1.64:9000/outpost.goauthentik.io;
 5    # ensure the host of this vserver matches your external URL you've configured
 6    # in authentik
 7    proxy_set_header        Host $host;
 8    proxy_set_header        X-Original-URL $scheme://$http_host$request_uri;
 9    add_header              Set-Cookie $auth_cookie;
10    auth_request_set        $auth_cookie $upstream_http_set_cookie;
11    proxy_pass_request_body off;
12    proxy_set_header        Content-Length "";
13}
14...
With that entered, we can test it out by going to the web application in an incognito tab. If done right, it’ll prompt for login.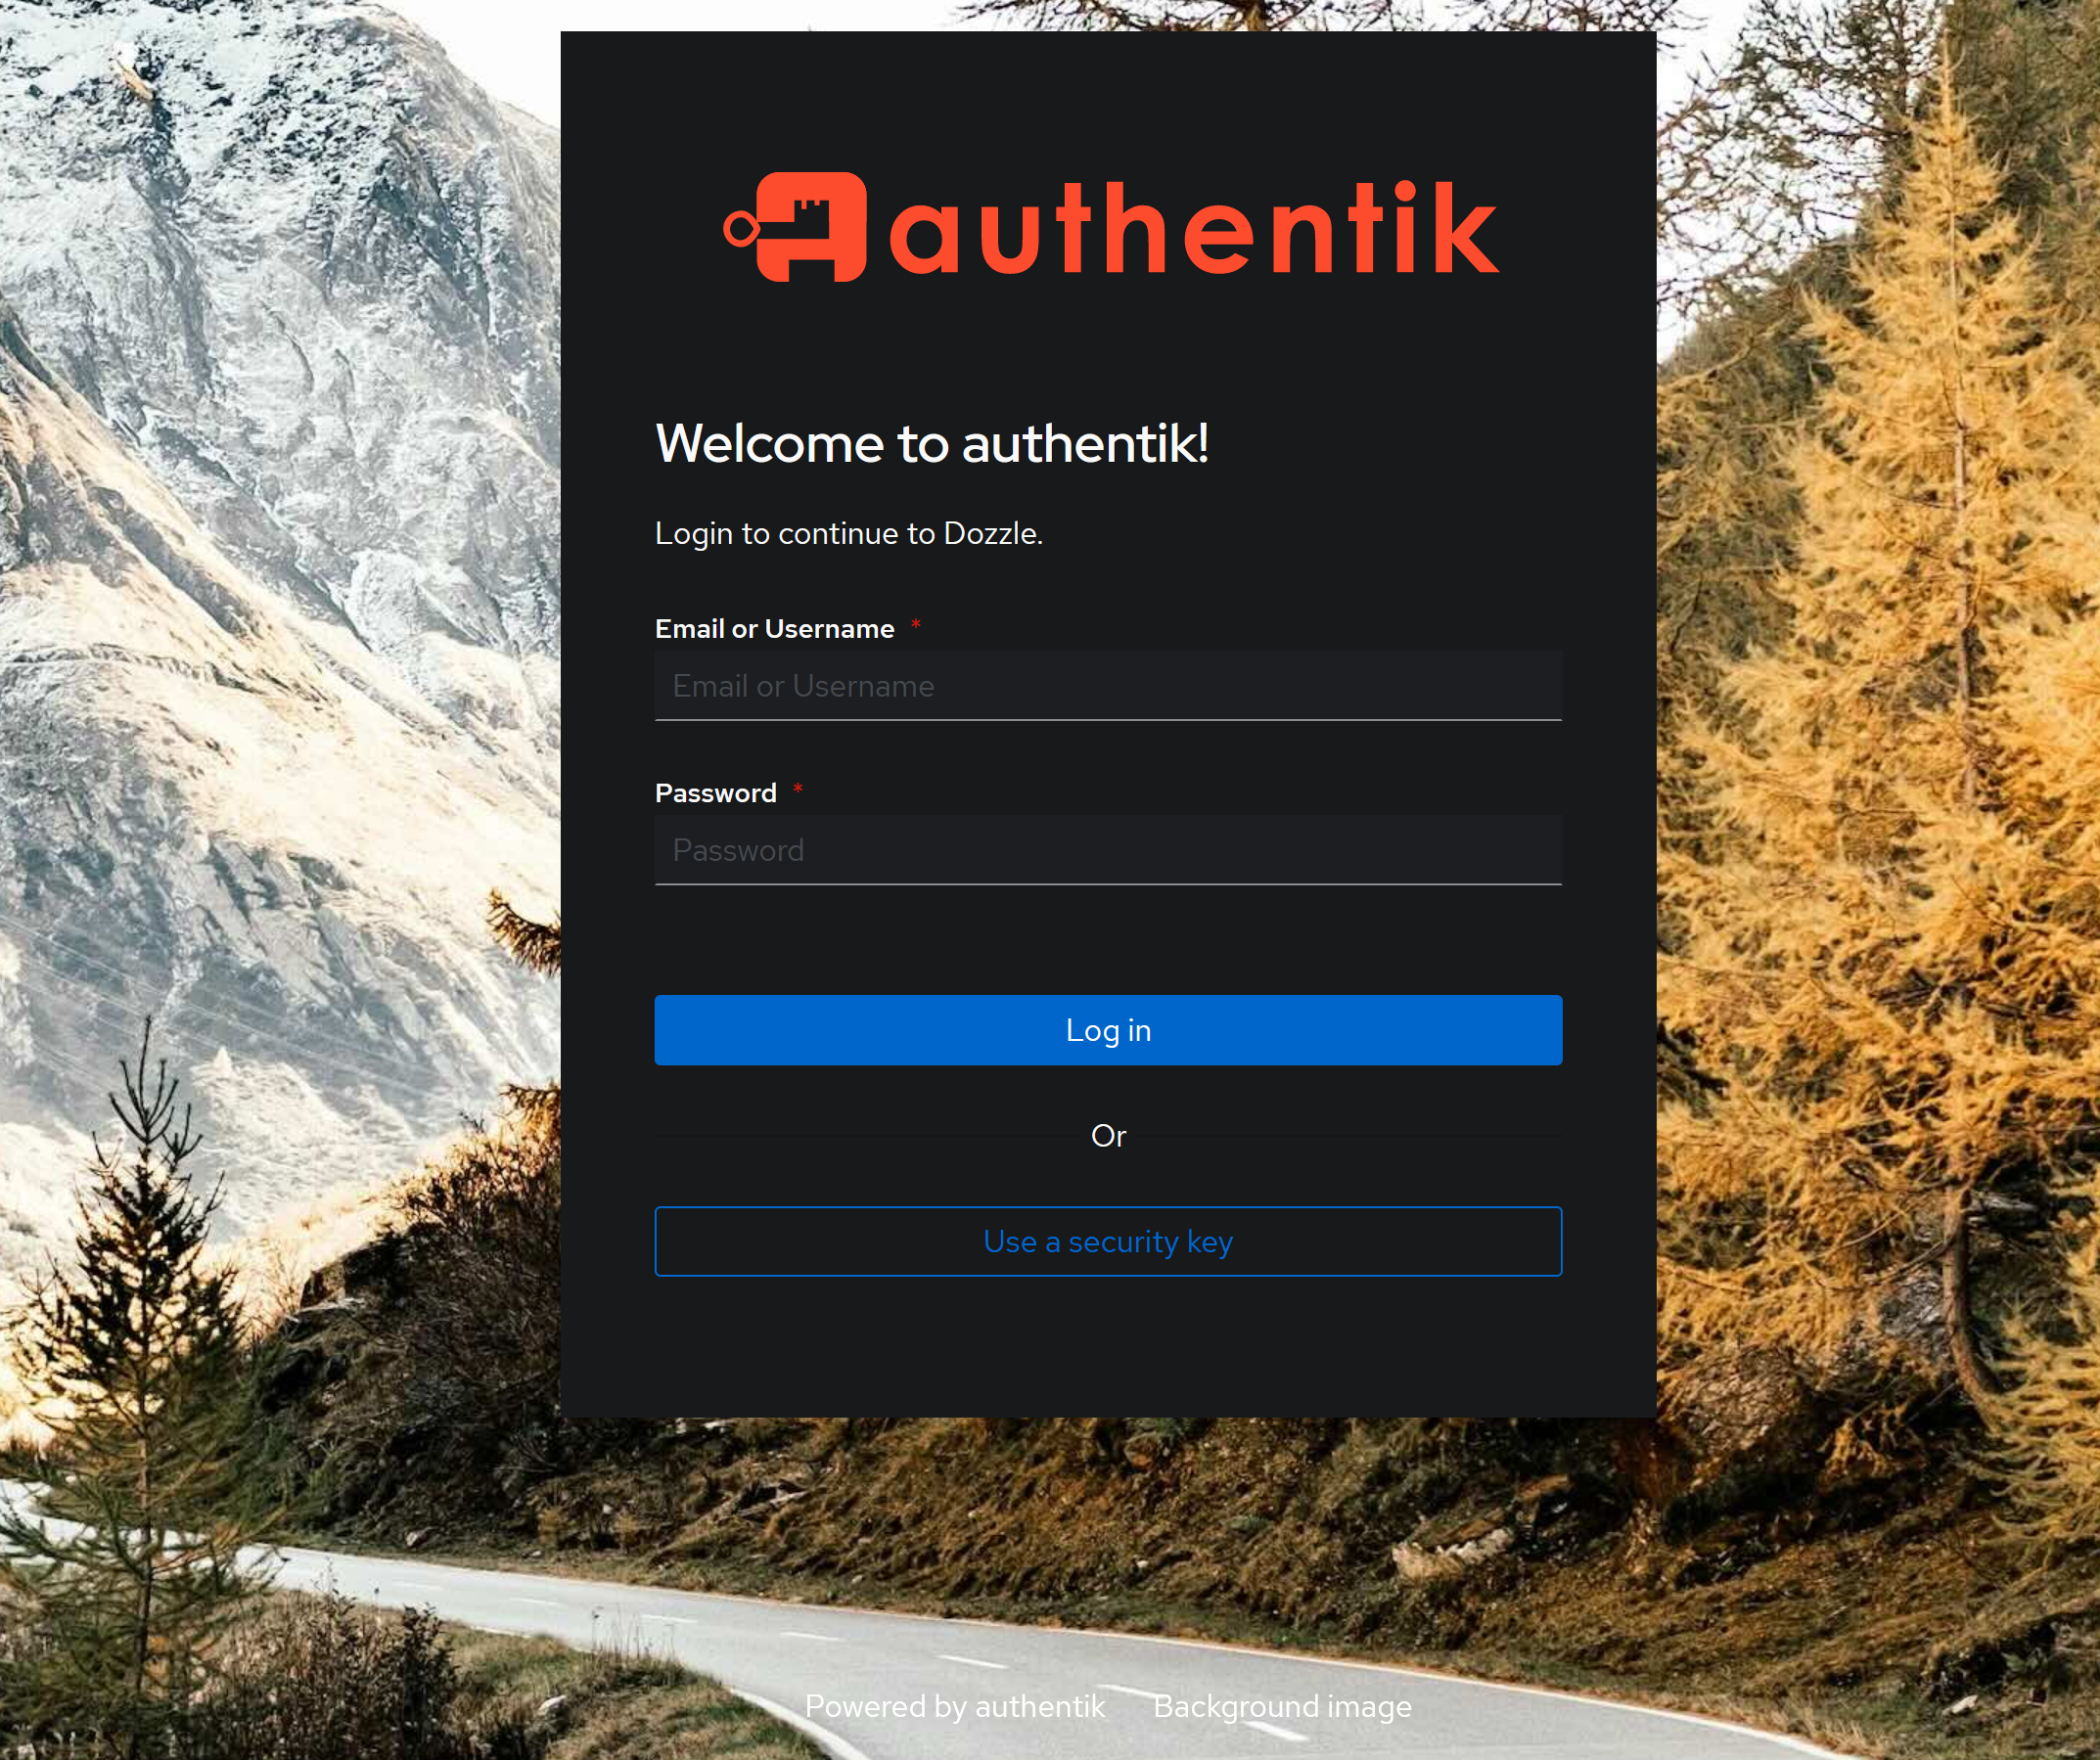
Where To Go From Here
With that out of the way, you’ve secured your first application with Authentik and Nginx Proxy Manager, and I’m sure you’re eager for more educational tutorials.
I highly recommend that you check out Cooptonian’s YouTube channel, which has an extensive collection of high-quality videos. These videos range from configuring enrollment to passwordless login.
Remember, securing your applications is just the first step, and it’s important to continue learning and refining our skills to stay ahead of possible threats!